Transfer items between equipment reservations
The possibility to reserve equipment is one of the key features of an efficient equipment management system. It has been a crucial part of Trail Equipment management since its infancy.
The reservation feature has a lot of use cases. For example:
- in the performing arts industry for tracking equipment usage in productions
- in schools and universities for tracking students’ and staff members’ equipment loans
- in many other industries for planning the equipment usage in all kinds of projects.
For a long time, Trail has had a feature that allows scanning equipment from one reservation to another in the mobile or browser app. We have now improved the reservation feature with an easy way to transfer items between reservations without the need to scan the items.
There are times when you want to transfer items between reservations fast. For example, the next theatre show on stage might need some of the equipment from the previous show. Or if you want to move some of the equipment from one project to another, you might want to do it with a couple of clicks on your laptop without breaking a sweat.
In this blog post, I will walk you through the new functionality.
Step 1 – Select the items you want to transfer
First things first. This functionality and the checkboxes in reservations are not available by definition. If you want to use this functionality in your Trail, please contact our technical support: support@trail.fi
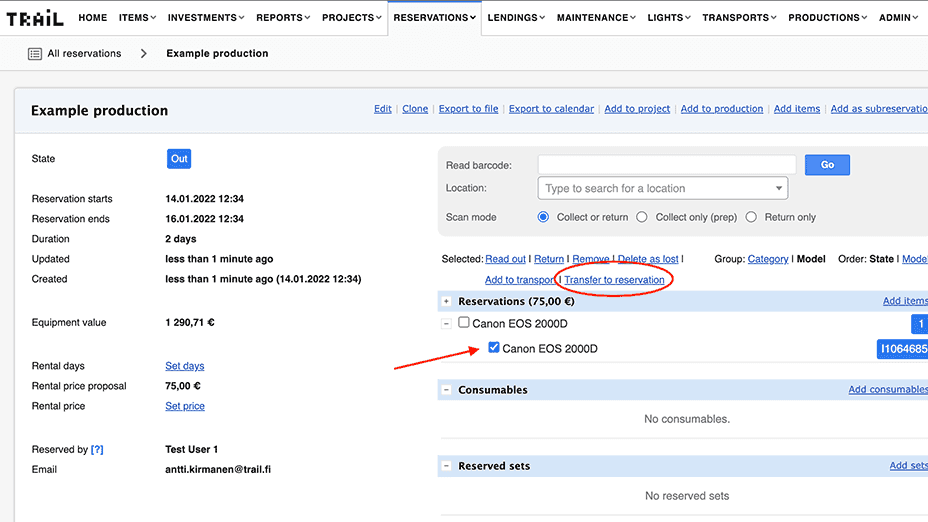
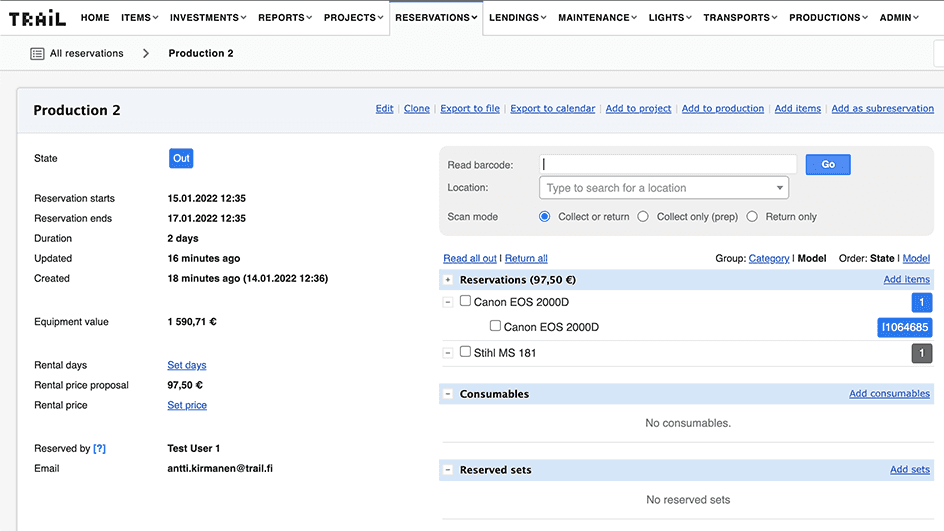
The Transfer to reservation functionality appears in the reservation’s view. The reservation must be in Out state. This means that you need to scan the equipment out before you can transfer it to another reservation.
In the reservation view, you will see checkboxes on the items’ rows. Select the items you want to transfer to another reservation.
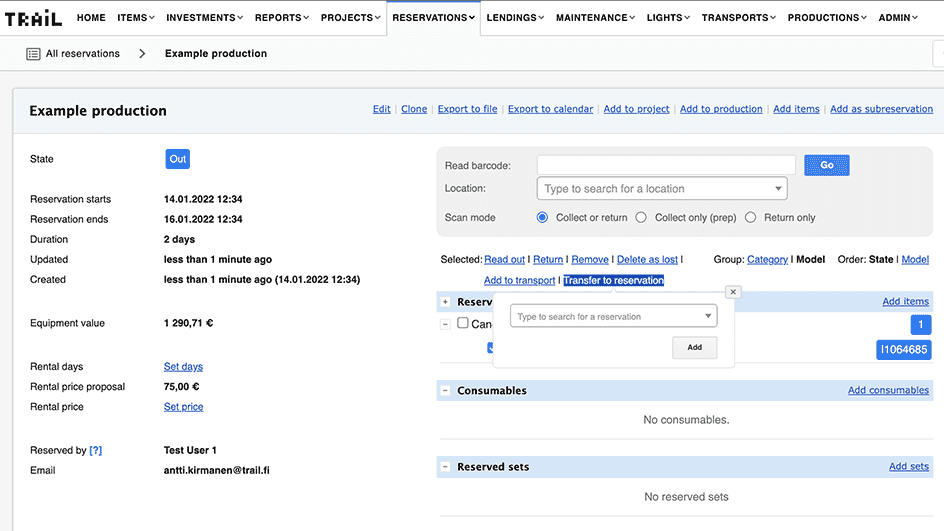
Step 2 – Select the target reservation
When you have selected the items, a Transfer to reservation functionality appears above the reservation’s item list.
Click the Transfer to reservation link. You can either type in the reservation name or select the target reservation from a dropdown menu. After you have selected the target reservation, click the Add button. Trail will transfer the items to the target reservation. If the transfer is successful, Trail will show a green confirmation
When you transfer the items, Trail will automatically mark the items as returned from this reservation. They will appear green in the reservation’s view. If you have transferred all items, Trail will also mark the whole reservation as returned.
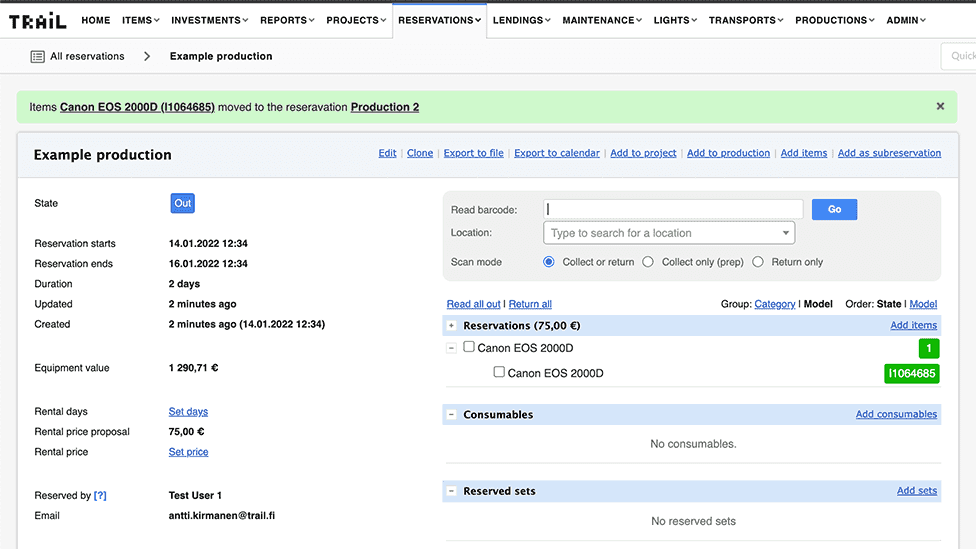
Step 3 – Check the target reservation
As a last step, you can check the target reservation. Trail has added the items in the target reservation and marked them in the out state.
If you have any questions, you can contact our support at support@trail.fi.
If you are not yet using Trail, you can always book a demo to learn more.